3. It says the theme is broken or missing a style sheet?
4. I would like a refund?
5. How do I allow users to register to my site?
6. How I do I disable the WordPress Admin Bar for users?
7. "The link you followed has expired. Please try again." error
8. Translating the months in release dates
9. Why am I not receiving emails?
10. Switching To Tablet and Mobile View in Elementor
11. Increasing PHP Memory Limit
12. Adding custom post/page options
13. Ordering posts by views
14. Adding shortcodes via custom fields
15. How to install the default Twenty-Twenty * themes?
16. I can't get see any rating or page loader icons?
17. Increasing WordPress Upload Limit
18. Increasing Post Maximum Size
19. I get a Page Not Found error when I click on links?
20. Why are the Good and Bad Points not displaying on the page?
21. I get a "Sorry, the content area was not found in your page" error
22. After updating BuddyPress my website won't load or I get a fatal error?
23. Comment form is not reloading after submitting comment
24. What SEO plugin do you recommend?
25. How do I show all members in Members Directory as the admin?
26. How do I add/remove breadcrumbs?
27. How do I add/edit the favicon?
28. How to edit/remove the loading icon?
29. Manually editing user rating on a post
30. Using comment plugins such as Disqus
31. Updating your PHP version
32. How do I find my ThemeForest Item Purchase Code?
33. Increasing PHP Maximum Execution Time
34. Creating BuddyPress Profile Menus
35. How do I set Web Hosting details?
36. How to add custom fields
1. Finding the cause of your issue(s)
To find the cause of the issue(s) please do the following:
1. Update The Theme/Plugins
Ensure you using the latest version of the theme and required plugins. We will not look at any issues if you haven’t updated these. To update the theme and required plugins please refer to the theme documentation.
2. Switch Themes
If updating the theme/plugins didn't fix the issue go to Appearance > Themes and activate the Twenty Twenty-One theme and see if the issue(s) still occur. If your site has visitors you can use the Theme Test Drive plugin so your users don’t see the theme you’ve switched to.
If the issue(s) still occur this means the theme is not causing the issue and this is probably a general WordPress or plugin issue.
3. Deactivate All Plugins
To see if it is a plugin issue deactivate all activated plugins (except the plugins that are needed to test the issues). If this fixes the issue(s) this means the theme is not the cause. Reactivate the plugins one by one or in groups so you can identify which plugins are responsible.
4. If the theme is responsible
If the issue only occurs when this theme is activated it looks like the theme is responsible. Please provide WordPress admin access and I'll take a closer look.
2. Increasing Maximum Input Vars
Maximum input vars limit the number of input variables which affect menus and theme options in the Aardvark theme. To increase the Maximum input vars do the following:
Method 1: Increasing Max Input Vars In .htaccess File
Step 1: Locate the .htaccess file inside the root of your WordPress installation (located in the same folder as your /wp-content/ and /wp-admin/ directories) using an FTP client or file manager in your web hosting control panel (if you can’t find it see why you can’t find the .htaccess file and how to find it or if you’re not sure how to do this, ignore the steps below and contact your web host who can do this for you).
Method 2: Increasing Max Input Vars In php.ini File
Step 1: Locate the php.ini file inside the /wp-admin directory using an FTP client or file manager in your web hosting control panel (if you’re not sure how to do this, ignore the steps below and contact your web host who can do this for you).
Step 4: If you still have issues, look for this file in your root directory and make the same changes.
3. It says the theme is broken or missing a style sheet?
If after installing the theme it says it is broken or the style sheet is missing it's nothing to worry. This is one of the most common errors new users to WordPress experience. To upload the theme correctly do the following:
Go to your ThemeForest Downloads page, locate the theme, click the green Download button and select the Installable WordPress file only option.
Log in to the WordPress Admin Panel.
Go to Appearance > Themes.
Click the Add New button.
Click the Upload Theme button and upload the zip file you just downloaded.
4. I would like a refund?
Before requesting a refund
If you're having any issues with a theme you've just purchased this can be incredibly frustrating, however in most cases the issues can be quickly resolved.
If you still have an issue please open a ticket on the support site at: https://ghostpool.ticksy.com Please describe your problems in as much detail as possible, providing any error messages you receive.
If you have downloaded the theme this means you now have a copy of the theme and will only be eligible for a refund if it meets one or more of the following criteria:
Before I can issue a refund I need to determine that the theme is causing your issues (in most refund request cases, it turns out not to be).
To do this please open a support ticket at https://ghostpool.ticksy.com and describe your problems in as much detail as possible, providing any error messages you receive and the steps to replicate the problem.
If it does turn out to be a theme issue and I cannot fix it, you will be issued with a full refund.
Why a refund will not given
You will not receive a refund in the following situations:
you don't want it after you've downloaded it;
the item did not meet your expectations;
you simply change your mind;
you bought an item by mistake;
you do not have sufficient expertise to use the item;
you ask for goodwill; or
you can no longer access the item because it has been removed (Envato advise you to download items as soon as you have purchased them to avoid this situation).
5. How do I allow users to register to my site?
This is a general WordPress option that can be found under Settings -> General -> Anyone can register.
If you're using BuddyPress the register page should have been created automatically. If it has not, create a new page called "Register" and publish it. Now go to Settings -> BuddyPress -> Pages and select this page from the Registration dropdown menu. Now you can link to this page in your menus from Appearance > Menus.
6. How I do I disable the WordPress Admin Bar for users?
If you're using BuddyPress go to Settings > BuddyPress > Options and disable the Toolbar option.
7. "The link you followed has expired. Please try again." error
You are seeing this error because the theme is too big to be uploaded to your site. This is because your web host has set one of the following too low:
Follow the links for how to increase each of these values.
Alternatively you can upload the theme through an FTP client or file manager in your cPanel. To set up an FTP client refer to the WordPress documentation on this http://codex.wordpress.org/FTP_Clients.
Once you have set up your FTP client upload the aardvark theme folder to /wp-content/themes/ directory on your server.
8. Translating the months in release dates
In your child theme's functions.php file add the following:
function ghosptool_translate_months( $date ) {
    // Add all months you want translated
    $current_months = array( 'January', 'February', 'March', 'etc' );

    // Add all your translated months in same order with their counterparts
    $translated_months = array( 'Enero', 'Febero', 'Marzo', 'etc' );

    $translated_date = str_ireplace( $current_months, $translated_months, $date );
    return $translated_date;
}
add_filter( 'ghostpool_post_meta_release_date', 'ghosptool_translate_months' );
9. Why am I not receiving emails?
This is unlikely to be a theme issue and it is most likely server or plugin related.
To test this, activate the default Twenty Twenty-One theme (don't worry this won't affect your site content). If the issues still occur this means the theme is not causing the issue. Make sure whatever plugin you're using is set up correctly and that you have no typos in your email address.
If your server does not allow emails to be sent out try using the following plugin:
10. Switching To Tablet and Mobile View in Elementor
In the Elementor editor in the bottom left hand corner click the Responsive Mode icon to change the display from desktop to tablet or mobile.
You can now change the styling for the display you've switched to and access elements that may have been hidden.
Also check out this video on how to use responsive editing in Elementor.
11. Increasing PHP Memory Limit
To increase the PHP Memory Limit do the following:
Method 1: Increasing Memory Limit In wp-config.php File
Step 1: Locate the wp-config.php file inside the root of your WordPress installation (located in the same folder as your /wp-content/ and /wp-admin/ directories) using an FTP client or file manager in your web hosting control panel (if you’re not sure how to do this, ignore the steps below and contact your web host who can do this for you).
Step 2: Paste this code in your wp-config.php file just before the line that says “That’s all, stop editing! Happy blogging.”:
define( 'WP_MEMORY_LIMIT', '256M' );
Step 3: Now save the file.
Note: If this solution does not work then this means your web hosting service provider does not allow WordPress to increase PHP memory limit. You will need to ask your web host to increase this limit for you.
Method 2: Increasing Memory Limit In php.in File
Step 1: Locate the php.ini file inside the /wp-admin directory using an FTP client or file manager in your web hosting control panel (if you’re not sure how to do this, ignore the steps below and contact your web host who can do this for you).
Step 2: Paste this code in your .php.ini file:
memory_limit 256MB;
Method 3: Increasing Memory Limit In .htaccess File
Step 1: Locate the .htaccess file inside the root of your WordPress installation (located in the same folder as your /wp-content/ and /wp-admin/ directories) using an FTP client or file manager in your web hosting control panel (if you can’t find it see why you can’t find the .htaccess file and how to find it or if you’re not sure how to do this, ignore the steps below and contact your web host who can do this for you).
Step 2: Paste this code in your .htaccess file:
php_value memory_limit 256M
Step 3: Now save the file.
Note: If you encounter any errors while trying to set the memory limit using these two methods then it means your hosting provider has locked this setting and you will have to contact them to increase this limit.
12. Adding custom post/page options
To add your own option fields below posts/pages add the following to your child theme's functions.php file:
Replacing "gp_setting_id_1" and gp_setting_id_2 with your own IDs. Also change the title, field type and desc for each settings.
13. Ordering posts by views
If ordering posts by views the theme will order by daily views but you can also order by weekly, monthly and all time views. To do this activate the Magzine Child theme and in the child theme's functions.php file add:
Now you can use the Post Meta element. Set the Type setting to Custom Field and in the Custom Field Name give the name of the custom field you'll be adding your shortcode to.
On the desired post create a new custom field with the name you used above and the value as the shortcode.
15. How to install the default Twenty-Twenty * themes?
You may want to install the default WordPress theme in order to see if an issue still occurs when switching themes.
To install the default WordPress theme do the following:
Go to the "Appearance" section on the left-hand side menu, and then click on "Themes". This will take you to the themes management page.
At the top of the themes page, you'll see an option called "Add New". Click on it.
In the "Add Themes" page, you'll see a search bar on the right - search for "Twenty Twenty Four".
Hover over the theme and you'll see an "Install" button. Click on it to begin the installation process.
After the installation is complete, you'll see an "Activate" button. Click on it to activate the theme on your WordPress site.
16. I can't get see any rating or page loader icons?
If you can't see any of the theme icons such as for ratings or the page loader, gGo to Elementor > Settings > Features and disable the Inline Font Icons option.
17. Increasing WordPress Upload Limit
To increase the WordPress Upload Limit do the following:
Step 1: Locate the php.ini file inside the wp-admin directory (if you’re not sure how to do this, ignore the steps below and contact your webhost who can do this for you).
Step 2: Find the following line in your php.ini file:
upload_max_filesize
Step 3: Increase the value to 64MB or higher and save the file.
Step 4: If you still have issues, look for this file in your root directory and make the same changes.
18. Increasing Post Maximum Size
To increase the Post Maximum Size do the following:
Step 1: Locate the php.ini file inside the /wp-admin directory using an FTP client or file manager in your web hosting control panel (if you’re not sure how to do this, ignore the steps below and contact your web host who can do this for you).
Step 2: Find the following line in your php.ini file:
post_max_size
Step 3: Increase the value to 64MB or higher and save the file.
Step 4: If you still have issues, look for this file in your root directory and make the same changes.
19. I get a Page Not Found error when I click on links?
Sometimes your server rewrite rules need flushing. To do this go to Settings -> Permalinks and save the page.
In some cases you may need to change the permalink structure. To do this in the Custom Structure field add the following:
/%category%/%postname%/
Now save the page.
20. Why are the Good and Bad Points not displaying on the page?
If you've added good and bad points, ratings, a summary or any of the other options in the page settings and you don't see them on the frontend this is because the template this page uses does not contain the relevant element.
Below is an example of how to display the Good/Bad points on your page.
21. I get a "Sorry, the content area was not found in your page" error
Go to GhostPool Core > Display Conditions and under Page Templates make sure you have a template set for the Entire Site condition. This template must contain the Post Content element so it loads the_content filter.
22. After updating BuddyPress my website won't load or I get a fatal error?
If after updating to BuddyPress 12.1.1 your website won't load or you're getting a fatal error similar to this:
PHP Fatal error: Uncaught Error: Call to undefined function bp_core_get_user_domain()
It is likely a conflict with bbPress or another BuddyPress compatible plugin.
23. Comment form is not reloading after submitting comment
This will happen if you've added a Comment element to an end point tab. To fix this you also need to add a Comment element to the main page (your hub page tab). You can hide this Comment element by editing the Comment element, click the Advanced tab, under the Responsive toggle enable Hide option for all sizes.
25. How do I show all members in Members Directory as the admin?
If you're using profile filters to filter which members are shown in your Members Directory you may still want to see all members from the admin account.
To do this make sure you're using version 2.14 of the theme and GhostPool Core plugin, and then add the following to your child theme's functions.php file:
The breadcrumbs shown in the demo are added by the Yoast WordPress SEO plugin. Install this plugin and then go to SEO -> Search Appearance and click the Breadcrumbs tab and click Enabled.
27. How do I add/edit the favicon?
This is a core WordPress option and not part of the theme. Go to Appearance > Customize > Site Identity > Site Icon to change the favicon.
28. How to edit/remove the loading icon?
Go to GhostPool Core > Site Settings > Layout > Page Loader.
29. Manually editing user rating on a post
To manually edit the user rating on a post add the following to your child theme's functions.php file:
Edit the post ID, average rating, rating sum, user votes and criterion data to what you want. If the post has no criteria ratings replace this with:
$rating_data['criteria'] = array();
Now go to your post and refresh the page. Once the user rating has been updated remove this code from your functions.php file.
30. Using comment plugins such as Disqus
In order to use Disqus or other third party comment plugins you may need to disable the theme's own comment features. To do this go to Elementor > Settings > Advanced and disable the Theme Comment Features option.
31. Updating your PHP version
The theme requires at least PHP 7.3 or above because this is what WordPress itself recommends.
Updating Your PHP Version
In most cases you cannot update the PHP version yourself and need to contact your host about this. The upgrade process is easy and should be something your host can do for you without impacting your website or charging you a fee. Here's an email you can send to your hosting company:
Dear host,
I'm running a site on one of your servers and WordPress has listed PHP 7.2 as the recommended version on their requirements page: https://wordpress.org/about/requirements/
Can you please let me know if my hosting supports PHP 7.2 or higher and how I can upgrade?
If your host doesn't support PHP 5.6 or higher, you will need to find a host that does. We recommend DreamHost which supports PHP 5.6 or higher. If you contact another host, be sure to ask them which PHP version your website will run on before purchasing.
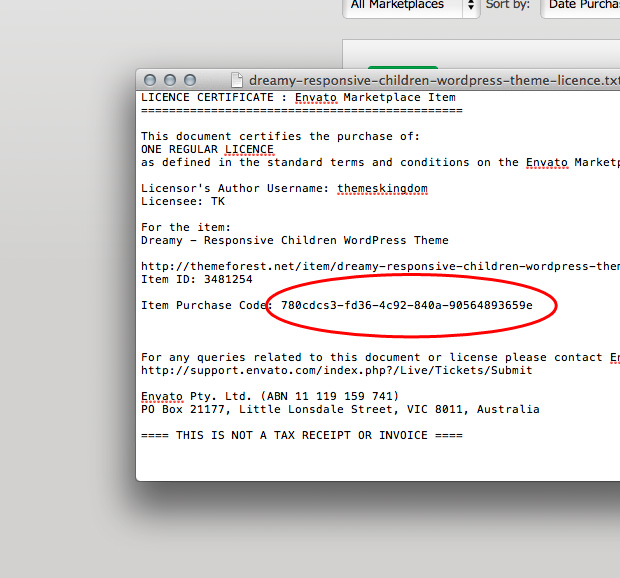
32. How do I find my ThemeForest Item Purchase Code?
To find your licence key/purchase code you need to log into your ThemeForest account and go to your “Downloads” page.
Locate the relevant theme and click on the Download button and next on the License Certificate & purchase code link in drop-down menu.
After you have downloaded the certificate you can open it in a text editor such as Notepad and copy the Item Purchase Code.
33. Increasing PHP Maximum Execution Time
To increase the PHP Maximum Execution Time do the following:
Method 1: Editing .htaccess File Manually
Step 1: Locate the .htaccess file inside the root of your WordPress installation (located in the same folder as your /wp-content/ and /wp-admin/ directories) using an FTP client or file manager in your web hosting control panel (if you can’t find it see why you can’t find the .htaccess file and how to find it or if you’re not sure how to do this, ignore the steps below and contact your web host who can do this for you).
Step 2: Paste this code in your .htaccess file:
php_value max_execution_time 180
Step 3: Now save the file.
Note: If you still get the error, try increasing the value to 600.
Method 2: Using A Plugin
Step 1: If you're not able to edit .htaccess file manually, then you can install and activate the WP Maximum Execution Time Exceeded plugin. That’s all. The plugin works out of the box and increases the maximum execution time to 300 seconds.
34. Creating BuddyPress Profile Menus
Step 1: Go to Appearance > Menus and create or edit an existing menu.
Step 2: Click the Screen Options tab in the top right corner of the page and make sure the BuddyPress Member option is checked.
Step 3: Now scroll down the page and you will see a BuddyPress tab where you can add BuddyPress profile links to your selected menu.
35. How do I set Web Hosting details?
The web hosting details display on the right is generated from custom fields. To add/edit/delete these custom fields on your posts see: